Before you can create a server, you need to have an environment to set that server up in.
Given we are using Amazon Web Services, you will need to have a key ingredient - an email account. You thought I was going to say and AWS account right? You do, but its not the key ingredient!
I recommend having an email account that has 'plus' addressing. This is where emails that go to user@domain can also be sent as user+text@domain as well. The alternative of course is to have aliases or even multiple email accounts such as text@domain. Plus addressing is a personal preference.
The reason for wanting multiple email accounts is easy to describe:
- You will have a primary AWS account that you really shouldn't be using once the overall system is set up - this needs a unique (and locked away) email address
- You will want to have AWS accounts per person working within AWS
- You will probably want (is that 'may' want?) to use rules within your email client to filter alerts and notifications - unique email addresses is great for this so plus addressing means less actual email accounts in use
I love plus addressing for meaning less email accounts in use (some email providers charge per account), as well as less configuration in a mail client needed to get the relevant emails. In larger organisations cost isn't such a big deal - I'm an extremest when it comes to trying to save money though!
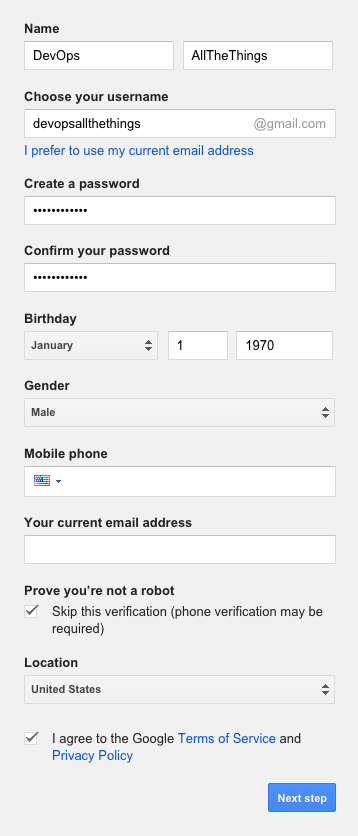
For my examples I'm using a gmail account called devopsallthethings@gmail.com. This gives me plus addressing of course. Please note this is an account I have set up for demo purposes, so don't bother emailing it - all emails are ignored. No, my birthday is not the epoch either (and it was changed in the form afterwards!) ;)
I recommend using the Mobile Phone option as well as using the 'Prove you're not a robot' option and enabling multi-factor (2-step as Google call it) authentication for security reasons. For this demonstration the core AWS account is linked fully to this email address, so you should do everything you can to secure the email account.
An example from early 2015 of the gmail account creation screen:
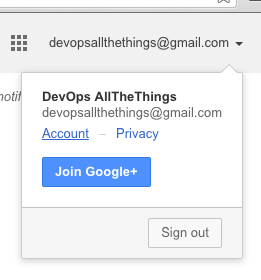
As mentioned, you should then go and secure your account - you do this by clicking on your email address in the upper-right of the browser and choosing the 'Account' link like so:
Then, enable 2-step verification - scroll down the list to the 'Signing in' section and click the 2-Step Verification row:

Follow the prompts - its a great system and very easy to use.
Right, now that you have an email account (or already had one you were planning to use and the above was rather boring!) then you are ready to sign up for an AWS account - again if you haven't got one already ;)
First, go to the Amazon Web Services (AWS) home page and click the 'Create an AWS Account' button which is usually in the top right corner of the page.
You should end up seeing something like the following:
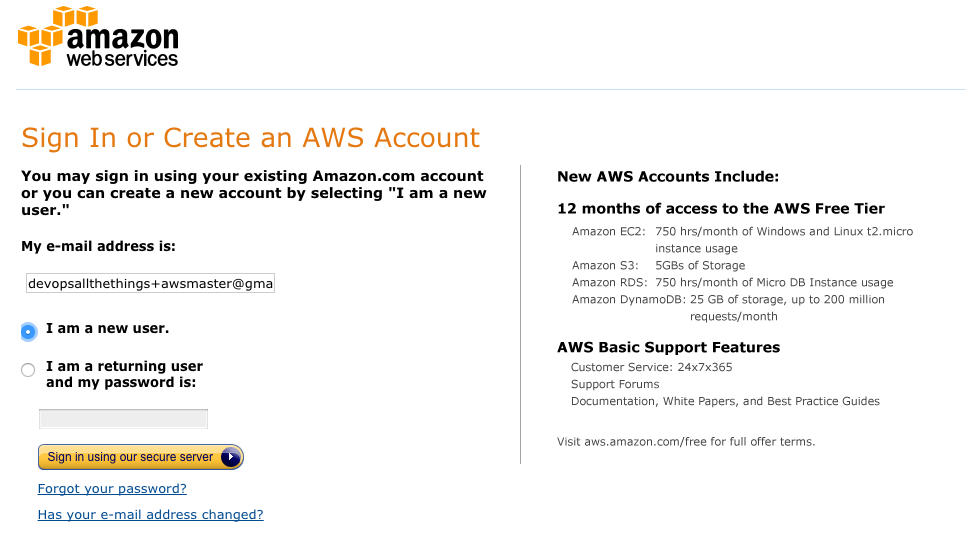
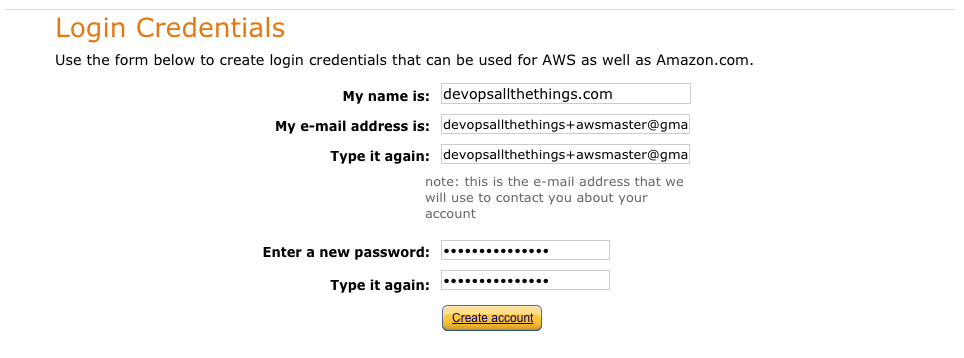
Note that I use +awsmaster as my plus addressing name to denote this is the master account for AWS. I only really want to log on with this account once, and then lock it away and never use it again.
You then need to put in your contact information. No screenshot for obvious reasons :)
Next, you need to put in a credit card. Don't worry, as long as you stop the servers, and only use T2.Micro's you shouldn't hit any of the limits and never get charged. Of course, if you do get charged, it will be for reasons that are fully under your control, so just remember you are in control of your own expenses!
This is also why I keep pointing out you need to secure your account - using a weak password and no multi-factor security on both your AWS and email account can easily lead to very large bills as there are people out there who would love to use a 'free' (free to them) account for nefarious purposes...
You will then be prompted to confirm your telephone number. This is easiest when spoken in my experience, as while you would expect the touch numbers to be clearer I've always had problem and had to speak.
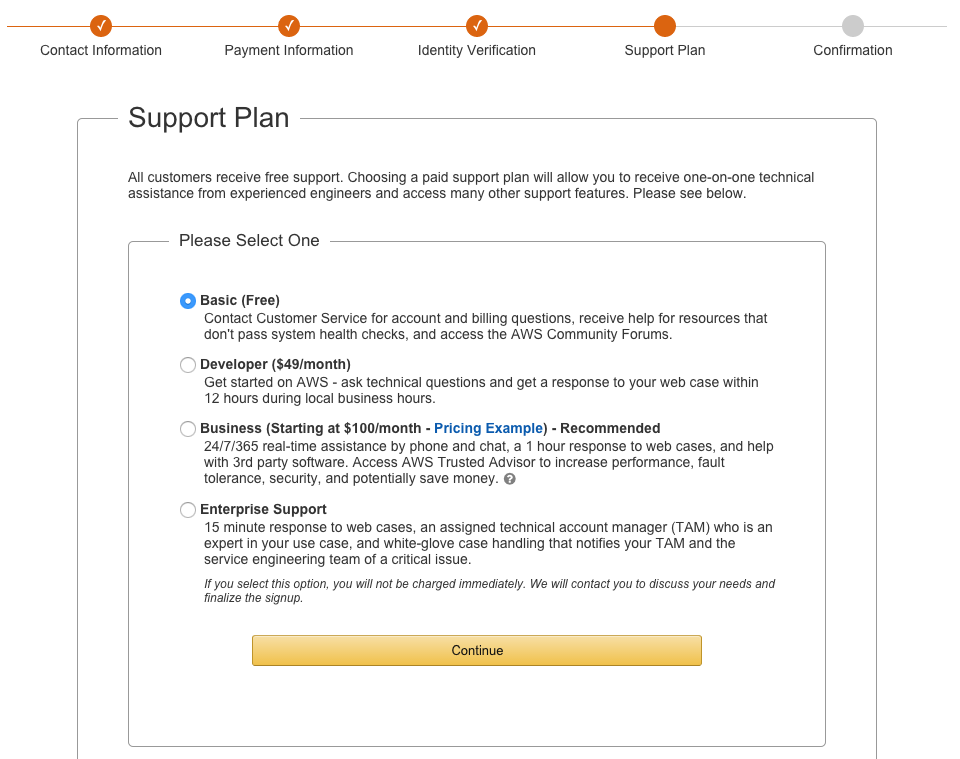
Once you are past giving tons of personal and financial information over, you are then asked which support plan you would like to use.
Free right? Thats my choice for the demo!
Well, now that is complete, you can log in to your newly minted AWS account. Or log in to the AWS account you already had. Either way works.
Log in to the raw console for the first (and hopefully the last) time via https://console.aws.amazon.com/
The AWS console is pretty scary to the uninitiated - after using it for a while you will have some shortcuts to the services you are actually using, but for now there is only one option you need to click. This is the Identity & Access Management (IAM) option which is under the 'Administration & Security' category:

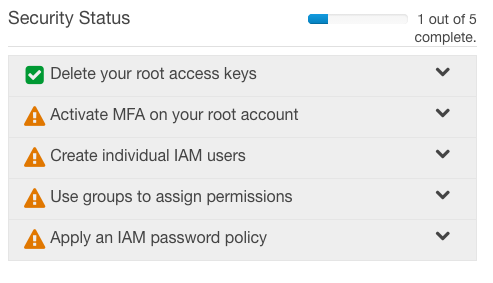
So now we are in the IAM dashboard, I find that after creating an easy to remember console url, following most of the steps AWS outline in the Security Status screen is the best bet:
Before we do that though, lets customise the IAM url we will use (a lot!) in the future. Click the 'Customise' option and choose something relevant to you and/or your organisation:
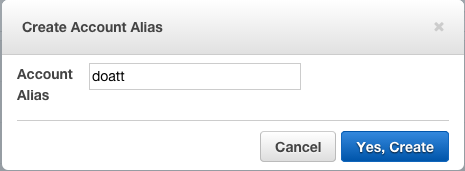
This gives us a slightly more memorable link than the one AWS gives by default (the account number basically):

So, on to the first security status step - Activate MFA on your root account. I personally use Authy. Again this is tied to a secured email account as it is again a great system to compromise if you are a hacker - and by 'compromise' I basically mean 'gain access to your email account'... Activating MFA can be undertaken in so many different ways I'm not going to walk through it - the steps are nice and simple and outlined clearly as you go. Plus, having screenshots of a valid QR code would just be silly.
Once you have secured your master or root account, the next step is to create a user account for yourself.
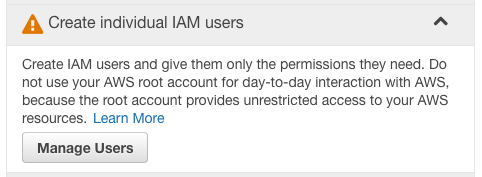
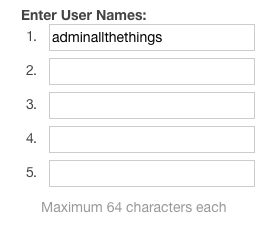
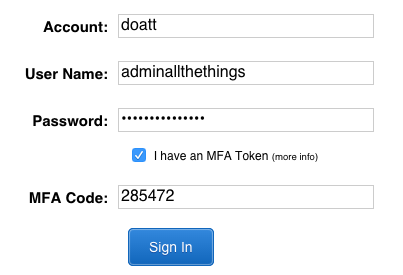
Creating a new user is very straight forward - with the main caveat that you should choose a forward thinking name (do you need to prefix by department or even purpose?). For this example I chose a user called adminallthethings. Note that generating an access key is important if you are going to use the API or console tools, but not important for your 'web interface' user account. As a result I recommend unchecking the 'Generate an access key for each user' option.
Now there are three more steps you have to apply to this new user account before you can use it for real. The first is attaching the 'admin' policy by clicking the 'Attach Policy' button inside the Permissions. Using the in-built Managed Policies is a good idea for this step.
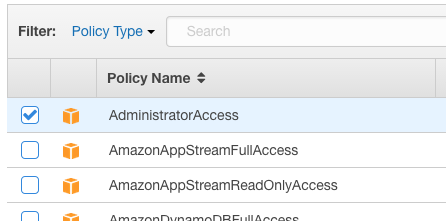
This gives the account full access to everything. Which means you need to secure this new account just as well as the master or root account. The only difference that I'm aware of (and I could be wrong!) is that only the master account can delete the entire account. Any account with write privileges to systems such as EC2 can create havoc so having administrator (or not having administrator) access isn't always such a big deal. Treat every account as if it can destroy everything you are hosting and you should be as good as you can get!
A quick view of what this means to AWS, as its basically just a JSON blob of text that says 'give this account access to all the things':
{
  "Version": "2012-10-17",
  "Statement": [
    {
      "Effect": "Allow",
      "Action": "*",
      "Resource": "*"
    }
  ]
}
We will cover how policies are written later as we use them to manage what servers (or accounts) can do a lot within the automation scripts.
The penultimate step on the account is to add a website password by using the 'Manage Password' button inside the Security Credentials section at the bottom of the user account. Since I use MFA on all my website accounts the complexity of the password isn't as big a deal as it could be. I still recommend using a password manager and using an initially randomised (and long) password that you never have to try and remember.
Finally for this new account, associate a MFA using the 'Manage MFA Device' option. This is the same process as what you just undertook in your master account, just with a second MFA entry.
There is another step in the IAM Security Status table - Use groups to assign permissions - and we will cover this in a future post. I use it a lot in how things are configured, so we will come back to it more than once in the future.
The final Security Status table item is 'Apply an IAM password policy'. If you mandate that all AWS website access is undertaken using accounts that have a MFA, this is not that important imo. I would still set it to eliminate some of the more moronic passwords such as Password1 that are used so frequently in production systems - just make the minimum 12 or more characters and turn all the options on if you are feeling mean :) Do require a MFA though - passwords are too often written down electronically.
Now don't log out too quickly - the last item of business you may want to add to the above is enabling billing access to your equivalent adminallthethings account.
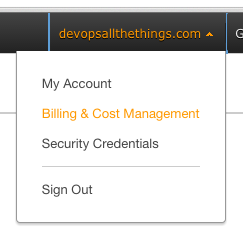
Adding this will mean that your administrator account can manipulate billing information - keep that in mind when thinking about adding this option, and this will apply to all administrator level accounts that you may create in the future so is a fundamental step.
To add the ability to see (and manipulate) the billing information from your adminallthethings account, you first choose the 'Account Settings' option from the menu on the left:
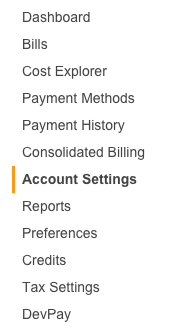
Then, scroll down to the

It's as simple as clicking edit, ticking the box that activates IAM access and clicking Update.
There are other options in there that you can also look at configuring (Security Challenge Questions for accounts that have real value is important for example). This is a demo though, so I'm not going to go over that in detail today. You may want to unsubscribe from all the marketing emails though ;) I have them enabled on other accounts, so if this is your first account, make sure you get them as most are quite interesting if you are using AWS long-term.
So we are pretty much finished with creating the account. Before we stop for this post though, log out of your master account and log in as your new user. Use the memorable link (its visible within the IAM Dashboard view if you can't find it immediately) and log on with that new account (and don't forget to use your MFA!):
Right, done. Ready for the next step. Once I write it up and post it ;)